Presentation of the Project
by http://clickerfou.free.fr/paludarium/waterfall/historique-en.html
Project status : Completed
Type : Paludarium
Size : 47,24 in x 23,62 in x 29,53 in
Open : YES
Tank materials : Extruded polystyrene panels (85%), support the underside of wood (10%) and Plexiglas (5%)
Lightning : Turbo Neon 4×55 Watts + Blue LEDs underwater
Irrigation : Drip on the plant wall
Misting : Two high-pressure nozzles
Fogger : Three cells located on the path to the waterfall
Type of scene : Natural & Artificial : Rocks molded polyurethane foam covered with waterproof mortar and acrylic paint. Branch of natural wood
Planting technique : Vegetable wall
Plant : Land and epiphytes (ferns, orchids, areca, tillandsia, ficus, Helxine, moss)
Animals : NO
Water depth : 5,90 in or 7,95 Gallon
TOTAL weight : Approximately 110lb (including water)
Next step : Let nature at work.

The “skeleton” of the body tank in 3D
Dimensions: 47,24 in wide, 23,62 in high (without caches), and 29,53 in deep.


The desired result in 3D simulation
It will focus on the waterfall, then a waterfall / river on three levels, malaria angle made of extruded polystyrene and plexiglass.
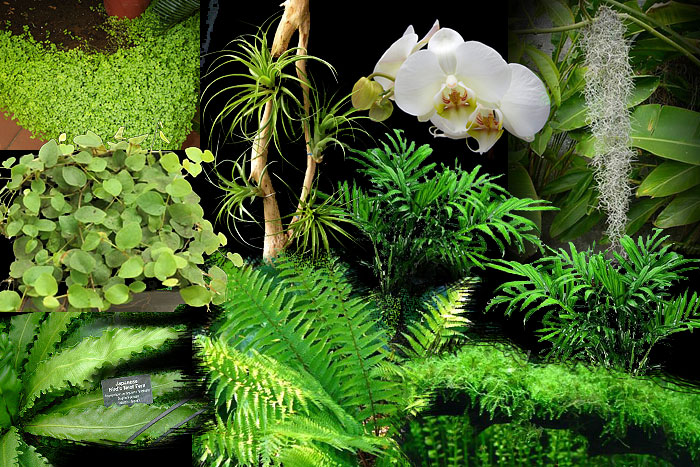
Listed plants, I expect the vast majority of ferns :
– Fern Asplenium Nidus – Alocasia sanderiana – Kentia – Areca Palm Tree – Fern Nephrolepis –
– Microlepia Speluncae Fern – Fern Blechnum spicant – Fern Polypodium Vulgare – Polystichum Fern munitum –
– Matteuccia struthiopteris Fern – Fern Hair – Ginseng Ficus – Ficus repens – Ficus Benjamina – Bromeliad –
– Beaucarnea Recurv – Pachira aquatica – Pothos – Chlorophytum – Helxine –
– Mini White Phalaenopsis Orchid – Java Moss – Moss Kyoto
– The overlap of foam polystyrene big rocks surrounding the waterfall.
– Three ultrasonic foggers (Fogger) distributed at each level of the waterfall.
– The sides are made with the technique of the plant wall.
– There will also branches of wood and vines across the whole setting and covered with moss and epiphytes.
– The high pressure misting system with two nozzles.
Starting
That’s it I’m finally launched, after long thought about the different techniques for the box, exit the PVC I decided to make extruded polystyrene entirely (except the bottom course of wood that will support the weight without bending).
This will be sealed with the seal aquarium, plus three special polystyrene resin layers on the interior.
On the rigidity of all I am not worried about that.
So I cut all the plates today. I still have to paste it all tomorrow to finally see the result standing.


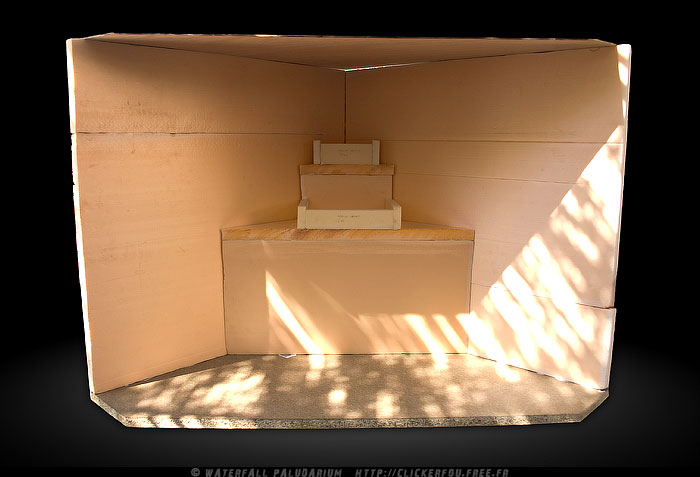
Implementation and bonding plates.

Introduction of silicon
(the plexi are not yet fixed and are used just to support up until everything dry)
Rocks and waterfall
Created in MPE (polyurethane foam) rocks and the waterfall gradually take shape.

Meanwhile I finished painting the outside of the body in black matt.

Here are all covered rocks the two layers of mortar.

The rocks once painted.

The texture detail (with moss to give an idea once all covered)

Implementation of Geotextile Felt
– I put two layers of felt of 300 gr/m² on the pvc pipe (drilled) installed on the ceiling, connected to the small pump and it starts to irrigate all the good tissue.
Note that the felt that I received contains a plastic film on one side, I was not happy with, but ultimately it is felt well and keeps moisture well. (I just hope it will not hinder the development of moss on the surface).

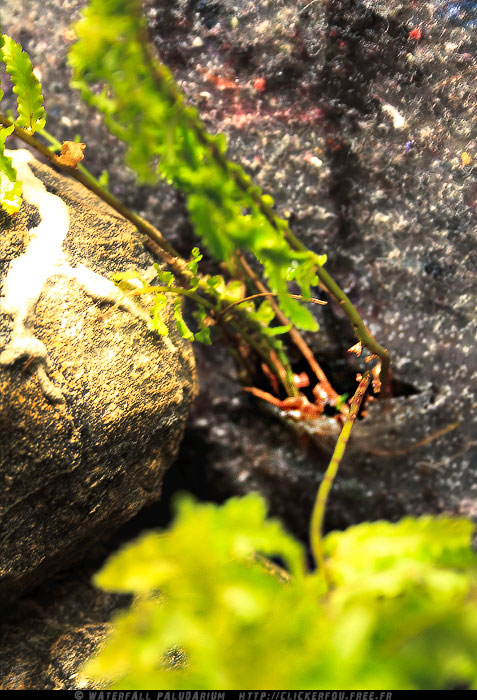
A first small fern stipe sandwiched between two fabrics.

Addition of small stones in MPE fill in the blanks for the rocks.


Lighting gallery
– Yes you heard correctly, the LEDs on the ceiling is finished, I decided to remove them (also from step “Mur Vegetal” the pictures are lit with neon turbo 4×55 Watts.
Why raise the LEDs?
Because their power does not suit me, the few plants that were below 11 months vegetated literally.
But all is not lost because having also lifted the blue LEDs backlight the water, following the non-sealing of my welds, I do not give the blue water provided and will be ordering a strip of LEDs already tight blue for 5 meters under water to circulate throughout the cascade.

Aluminum foil installed under the ceiling for better reflection of light.
(ballasts and connections are on the other side)

Power: 4×55 Watts, as saying that this is much more powerful than previous LEDs.

Addition of the moss, all lit in this new gallery.
Creation of the optical grating
– To hide the lighting part and take care of our pupils nice, I made a custom grid view to preventing or minimizing light loss.
– I placed the three fogger (one on each level of waterfall).
– Some branches of plants withers: the Kentia in both corners at the bottom in the shadows too. And some branches of the fern Nephrolepis.
– I will also add four new varieties of fern to fill the gaps that still exist.
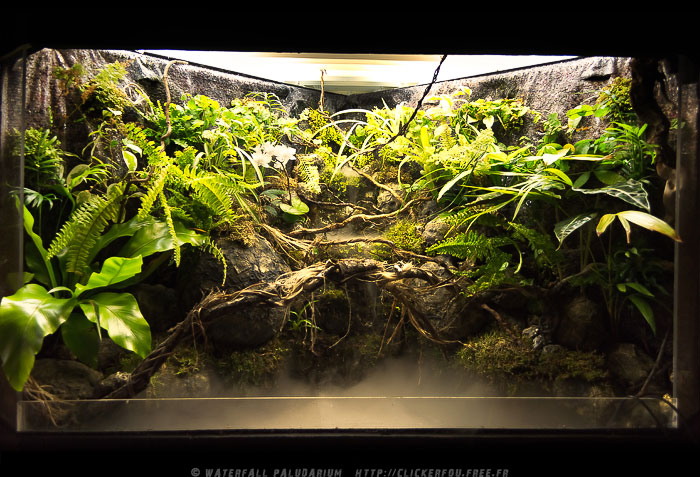
The optical grid thus consists of thin strips of PVC, all placed parallel without ever crossing to avoid losing the light on the center of tank.

The blades are not bent, it is the objective of the camera that twists slightly wide-angle perspective.

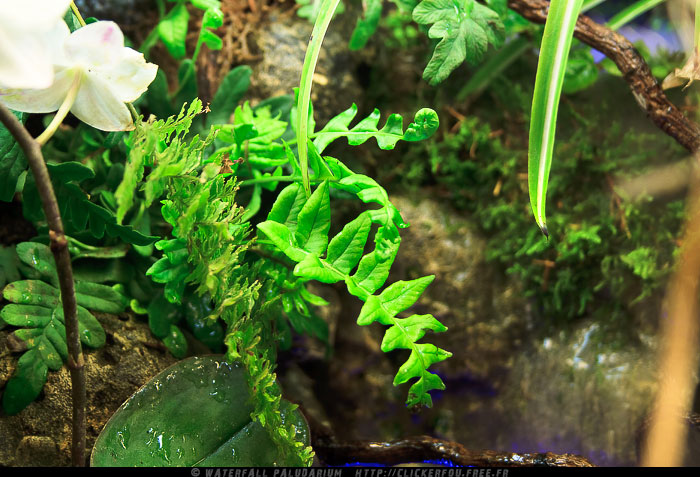
One month after the installation of plants, while continuing to grow nicely,
a piece of Kyoto moss has also begun to grow on the felt (left of photo above),
and around the green is also beginning to appear (right of photo above).

Optical grating black + blue LEDs
– I painted the front of the optical grid in black, for a maximum fade the effect of glare and it’s very effective. The light output is not reduced to the extent.
– I also started to implement the Blue Ribbon LED. (It remains to fix it)
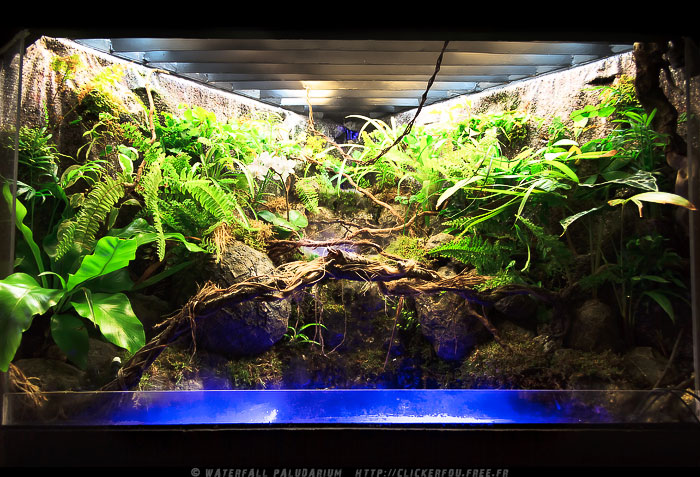


It remains for me to fix the tape parallel straight lines in small plastic brackets to hide them without losing their luminous efficiency as in the diagram below.

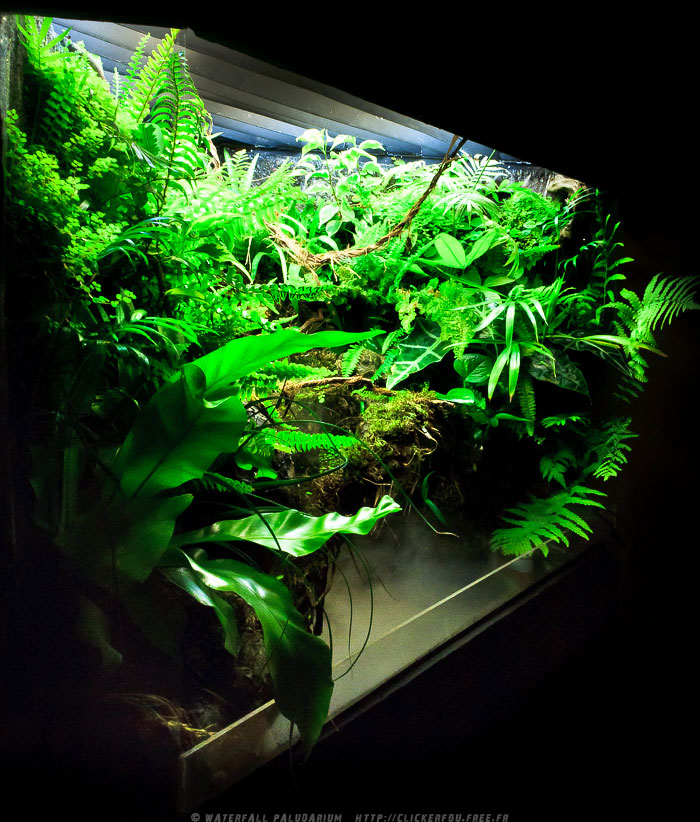
Viewed from the side
Adding new Ferns
– Here I received four new ferns, so here are in place.

Blechnum Spicant
Polypodium Vulgare

Polystichum Munitum

Matteuccia struthiopteris (the right in its adult form)

While the overview, I also added some branches of Areca top right.
Follow-up: 2nd Month


Without the blue LEDs.

Here is the Matteuccia struthiopteris now she literally exploded since its installation last month.
Its fronds are on average 40cm.

The mosses cascades started to grow.

On the left, the fronds of the fern Microlepia Speluncae are coming out,
but not yet visible from the outside, they will soon get through to see the day.
On the right is the capillary, which led to a good six inches since its installation.

Here the cutting of pothos in 3 out new leaves.
I also want to make it crawl around the large central branch as and when its shoot.
And finally an animation of the relief, to better understand the depth.
Follow-up: 3rd Month
Last month I had a concern at the shadow at the bottom right generated by bracken fern (struthiopteris). So I moved to the very bottom right, it is sufficiently large and powerful light to go back. (It is more shade, and has adapted well).
Overview, I added the moss on the large central branch.

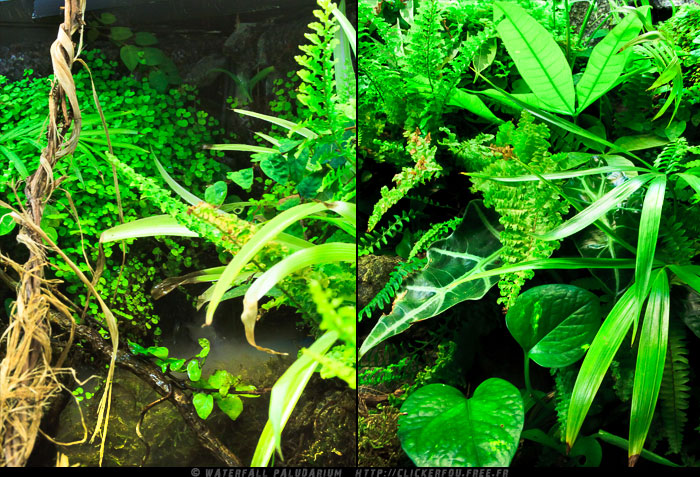
At left, Helxine quadrupled in volume and begin to hide the felt fabric.
The ficus repens and crawl forward.
At right, a new small sheet of Alocasia I did not see coming appeared.
The various ferns when they continue to grow.

The Orchid has lost its flowers in the month, the benefit of the shoot of a new leaf.

Full HD 1080p video – 2:32 min
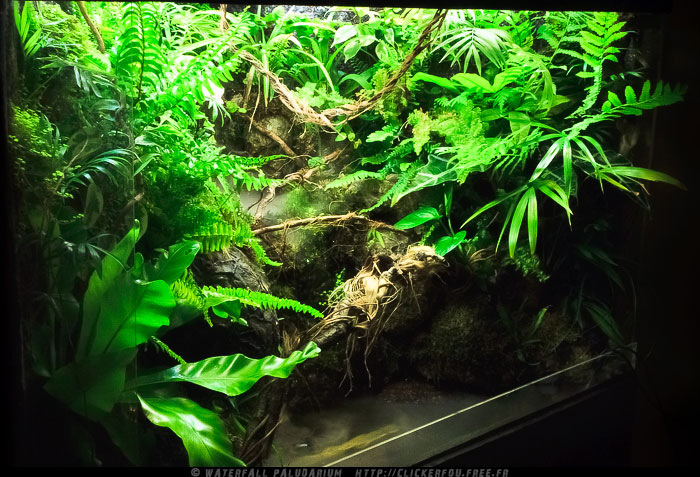
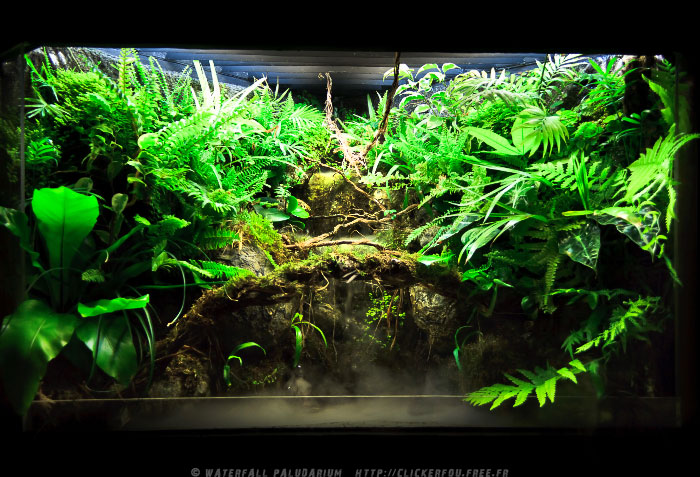
Follow-up: 7th Month
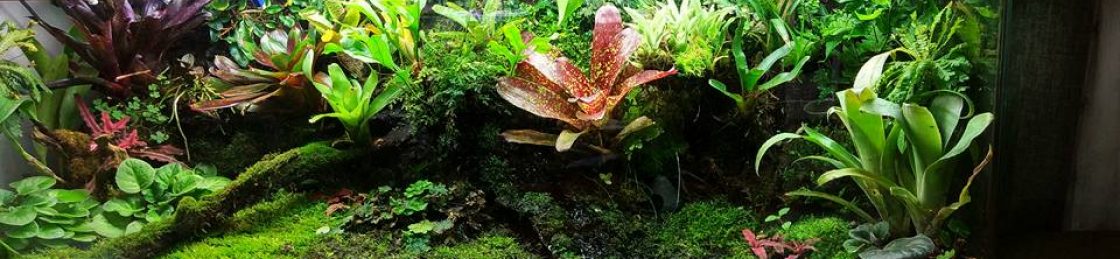
Months have passed since the last update, here is the colonization of the plant as it is after seven months.

The Pothos crawled out all along the central branch, the Helxine to cover all the upper parts
thus hiding all the felt fabric.
The Kentia and Areca other grow beautifully.
Cons by two of the four ferns purchased online have failed to adapt properly and you end up dying:
(The fern Polystichum munitum who was on the left is now colonized by Nephrolepis)
(And the fern Matteuccia struthiopteris (right) who had trouble finding its place as too large for this project).

The orchid has yet again with flowers, but two new leaves.


The alocasia does not stop making new leaves larger and larger.

The area surrounding the waterfall we were colonized by harmoniously Helxine

Follow-up: 1 Year
A year passed since the installation of plants in the paludarium, some disappeared, others are rather quickly rained. I purposely left to the natural proliferation of all. There is particular invasion by the Helxine.
Also note that just under the neon lights, tufts of Helxine have become dry due to lack of heat and humidity of up there. The fact that the paludarium is opened go across a little dry and will deserve a good humidity with high pressure nozzles for example, but it survives very well despite that.


Next step: Let nature at work…
Very descriptive blog, I enjoyed that a lot.
Will there be a part 2?
It may be, meanwhile, thank you for the compliments and continue to follow my blog.